Unlocking the Mystery Behind the Magic Eraser AI Tool
Ever felt frustrated by those pesky photobombs? Or that unexpected blemish ruining your perfect shot? Enter the magic eraser ai tool to save the day! This whizz-bang tech wizardry gives you the power to isolate and remove unwanted elements from your photos like it’s nobody’s business. But how does it work? Let’s dive into this magic trick without any smoke and mirrors.
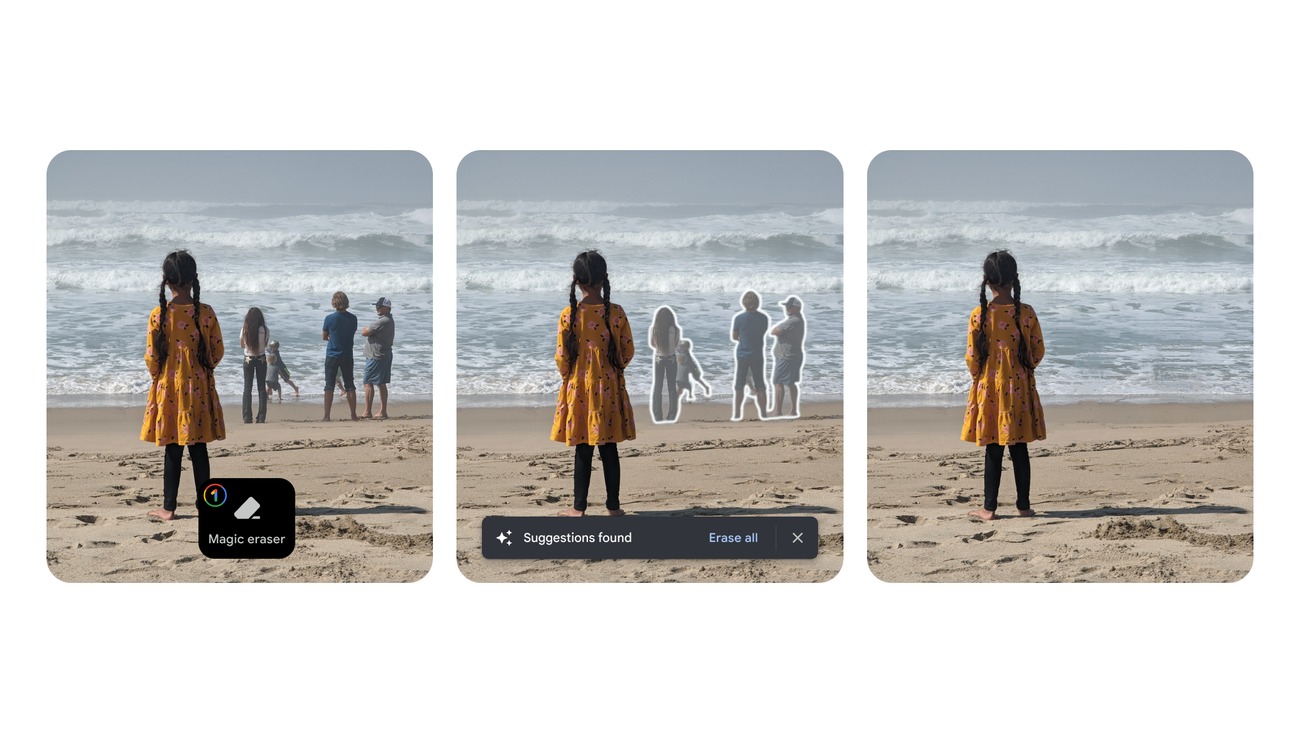
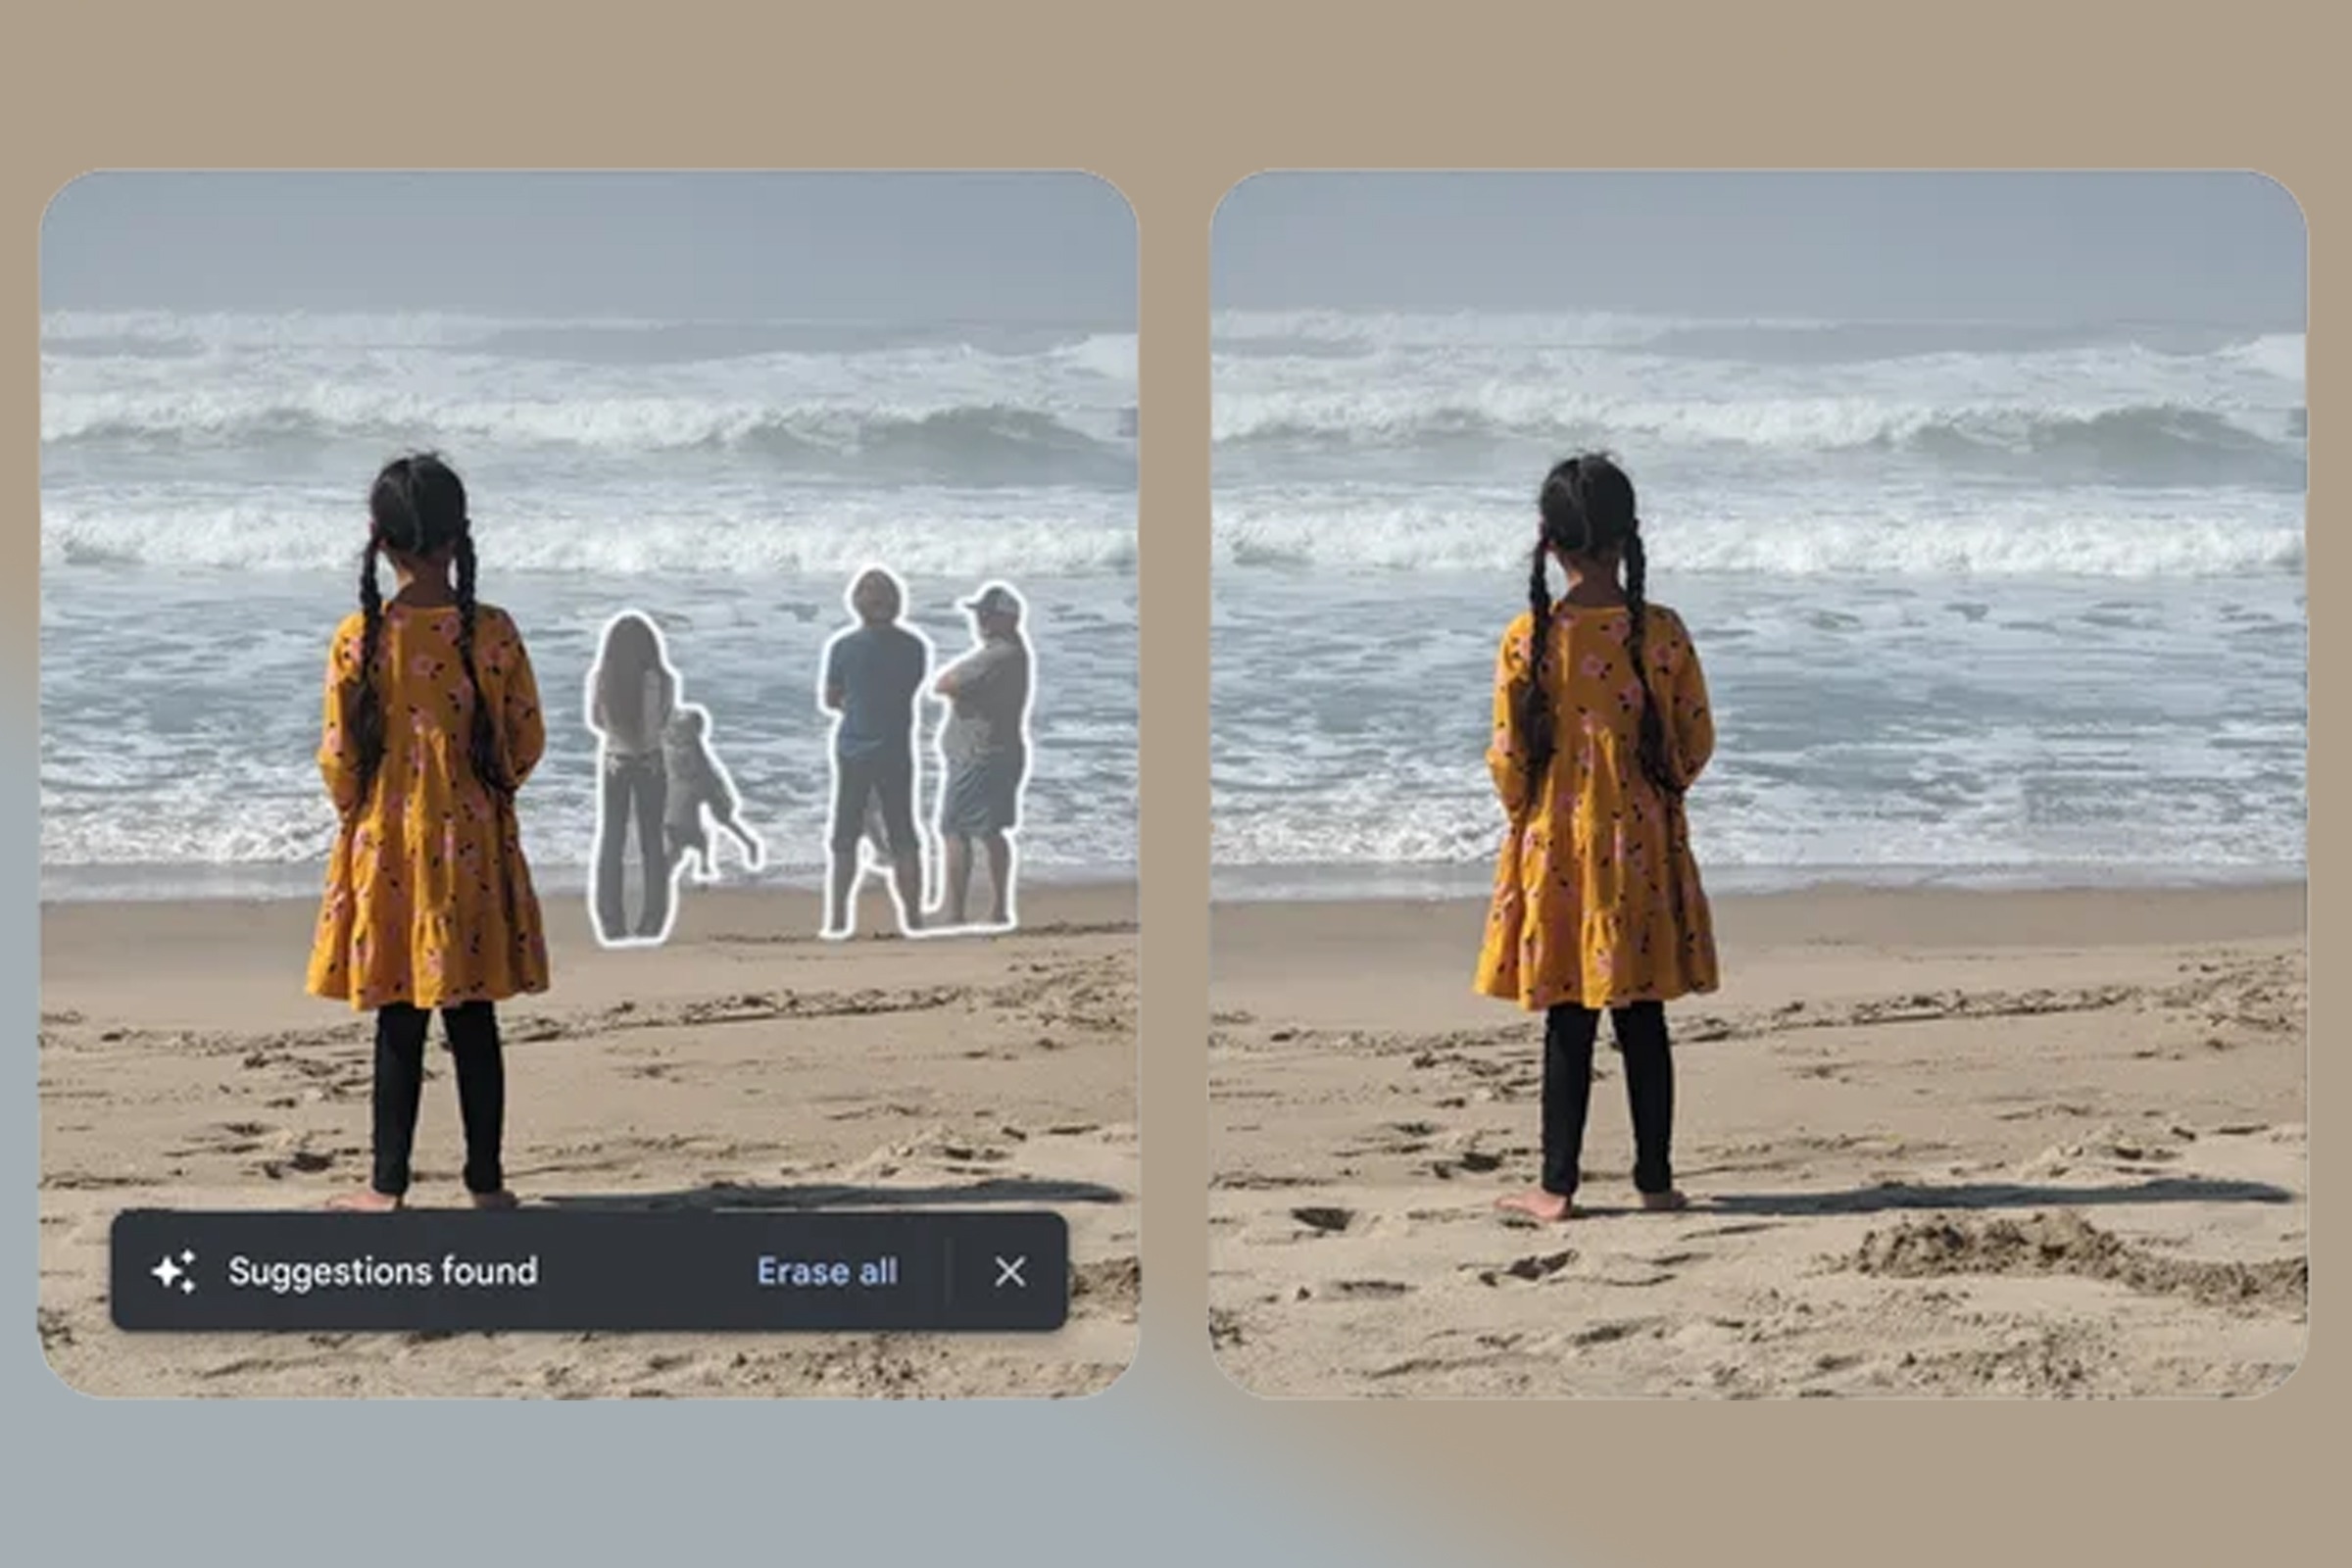
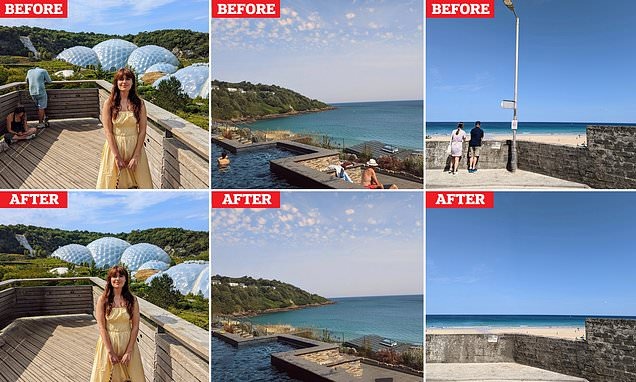
First off, this AI-driven tool operates with some impressive under-the-hood technology. The magic starts with object detection algorithms. These algorithms can identify different elements within an image. For instance, if there’s a random stranger wandering into your vacation pic, the tool can spot that intruder with unerring accuracy.
Once the object is identified, the eraser function comes into play. But don’t picture an old-school eraser smudging pencils—this is digital sorcery at its finest! By understanding the pixels that make up the image, the tool then works to cleanly remove the unwanted object. Think of it like a broom sweeping away digital dust—but without leaving a spot! The result? A seamless picture with nary a trace of the removed object.
Now, onto one of the juiciest bits—the AI’s learning capabilities. This tool isn’t static. Nope, it evolves. The more you use it, the smarter it gets. Consider it akin to teaching a dog new tricks. Initially, it might not be perfect, but give it time, and soon it’ll perform like a pro. The ability of the magic eraser ai tool to adapt and improve makes it even more powerful.
But wait, there’s more! The interface deserves a shoutout too. Nobody wants to navigate a tool that feels like defusing a bomb. This tool strikes gold with its simplicity. Even your tech-averse aunt could use it effortlessly. It’s all about click, erase, and voila!
Still on the fence? Picture this: you’re editing a group photo, and a bird photobombs the shot. You could spend hours with traditional software, zooming in and painstakingly editing it out. Or, with a few clicks using the magic eraser ai tool, the bird’s history. It’s like having a digital Houdini at your fingertips!
And let’s not forget the cherry on top: speed. Who has the time to spend ages nipping and tucking photos? The tool processes your changes in the blink of an eye. Gone are the days of waiting for your computer to chug through complex edits. This is quick, efficient, and keeps your workflow smooth as butter.
Now, suppose you have multiple images needing quick fixes. With batch processing, you can apply edits to an entire album without breaking a sweat. Imagine handling hundreds of photos in mere minutes. It’s like having a magic wand in your pocket.
User feedback loops also play a part. People use the tool, provide feedback, and voila—the tool improves. It’s collaborative magic, with users and developers working in harmony to refine the art of digital editing.
Speaking of developers, let’s throw in some tech love—the backend is built robustly, ensuring it runs smoothly across devices. That’s a fancy way of saying it works anywhere, anytime. Edit photos on your computer in the morning and tweak some shots on your tablet during lunch. The experience remains seamless.
One more nifty trick in its bag is background enhancement. If the removed object leaves an empty spot, the tool can suggest improvements to the backdrop. Think of it as a digital painter filling in the blanks. Your photos end up looking picture-perfect without any signs of tampering.
Magic Eraser Mastery: Step-by-Step Tutorial for Flawless Results
Have you ever gazed at a photograph and wished you could magically erase that stray photobomber or unwanted object from the scene? Your wish is granted with the magic eraser ai tool. This guide will walk you through using this incredible tool to achieve perfect, clean photos. Trust me, you’ll feel like a wizard by the end of it!
Step 1: Start with a Clean Slate
Open your image in the magic eraser ai tool. An intuitive interface that makes any user feel right at home will greet you. There’s no need to fret about being tech-savvy here. Just drag and drop your picture, and you’re ready to get started.
Step 2: Identify the Unwanted Elements
Look carefully at your photo. What doesn’t belong? Is there an uninvited guest in the background, or maybe a tumbling trash can? Pinpoint these distractions. Highlight them with your cursor, as this outlines the areas you’ll be erasing. Just think of it as marking up your worst enemy for deletion!
Step 3: Employ the Magic Wand
Here comes the fun part. Select the magic eraser ai tool and watch it work like a spellcaster. Now, highlight the object you’re itching to remove. The tool will immediately calculate which pixels to alter, restoring that part of your image as if the intrusion never happened. Boom! It’s swoosh and flick, and you’re done.
Step 4: Check the Details
After you’ve erased the distractors, zoom in on the edited area. This close inspection helps you spot any telltale seams or blotches. If there’s any smudge or deformation, don’t worry. You can use the tool’s fine-tuning options to blend the area, keeping your photo looking as natural as possible.
Step 5: Fine-Tune Texture and Color
Here’s where your inner artist comes out. Sometimes removing objects can leave an imprint on the color harmony or texture of your photo. Use additional features like color correction and texture blending to smoothen transitions. The magic eraser AI tool makes this as simple as pie, with its user-friendly sliders and presets.
Step 6: Save and Share
Once you’re happy with your edited masterpiece, hit the save button. The tool gives you a range of export options so you can choose the best format and resolution for your needs. Then, flaunt your spotless image on social media, and get ready for a chorus of “Wow, how did you do that?”
Pro Tips and Tricks
1. Practice Makes Perfect: The more you use the magic eraser AI tool, the better you’ll get. You’ll start considering which areas to tweak even before clicking on the tool.
2. Batch Editing: If you have multiple images that need a similar treatment, use the batch processing feature to save time. It’s like having a conveyor belt for your edits.
3. Use Creative Ideas: Don’t limit yourself to simply erasing. Sometimes a subtle edit, like removing a small detail, can amplify your photo’s focal point.