How to make natural edits without spending a penny to remove a free object tools? Photo editing is a fine craft. Digital sorcerers wave their machines instead of wands. But when it comes to free remove objects from photos, does it always look like a magic trick gone wrong? Of course not! Better yet, you don’t have to pay a cent. Take full advantage of free tool kits specially designed for eliminating physical trash from images. Now it’s all up to your own tricks.

First step: decide how you want to work and pick up the tools that do it for yourself. Each tool has its own features and styles, and be sure to try several before settling on one that fits snug like an old shoe. Retouch Pilot, for example, is one such favorite because of its simplicity and effectiveness. Inpaint, another popular choice: for those who want to feel like they are stepping into an artist’s shoes-despite digitally removing things rather than painting them. Another useful tool is GIMP, especially if you enjoy a good challenge. It’s open-source and has a lot more going for it than you might guess. It’s packed with features that, while not always easy to work with initially, yield fantastic results once mastered.
After you have the tools in hand, it’s time to dive into editing. Start with small things, such as removing a spot from Grandma’s old photograph. You’ll feel just like Houdini when eventually find that you can’t remember where the dirt was originally. Slowly work up to larger projects. Like a cook who knows when to put salt in her stew, learning how much of your photo can be eliminated without ruining it takes practice.
Here’s a golden rule: ALWAYS zoom in. It’s like looking at a tiny patch of the universe through a telescope. Up close allows you to see and skirt around subtle details that make all difference between an ‘okay’ edit and something that’s worth taking second. Zoom levels are your best friends, especially with tools that don’t provide quite the same precision as more expensive packages.
Don’t be afraid to experiment. Even the awkward teenage phase of editing by computer might teach you more than a final product in its prime. Think of it like trying on new clothes–a hat here, scarf there. You’ll eventually figure out what works for you! If one technique leaves behind a mark that s more prominent than a clown at the masquerade ball, why not try a different approach? Just use clones of areas adjacent to cover softly blemished spot- using a healing brush if one comes with your tool. Trial and error often lead creative breakthroughs rather than mere frustration.
Change Your Photos with Object Vanishing Tricks
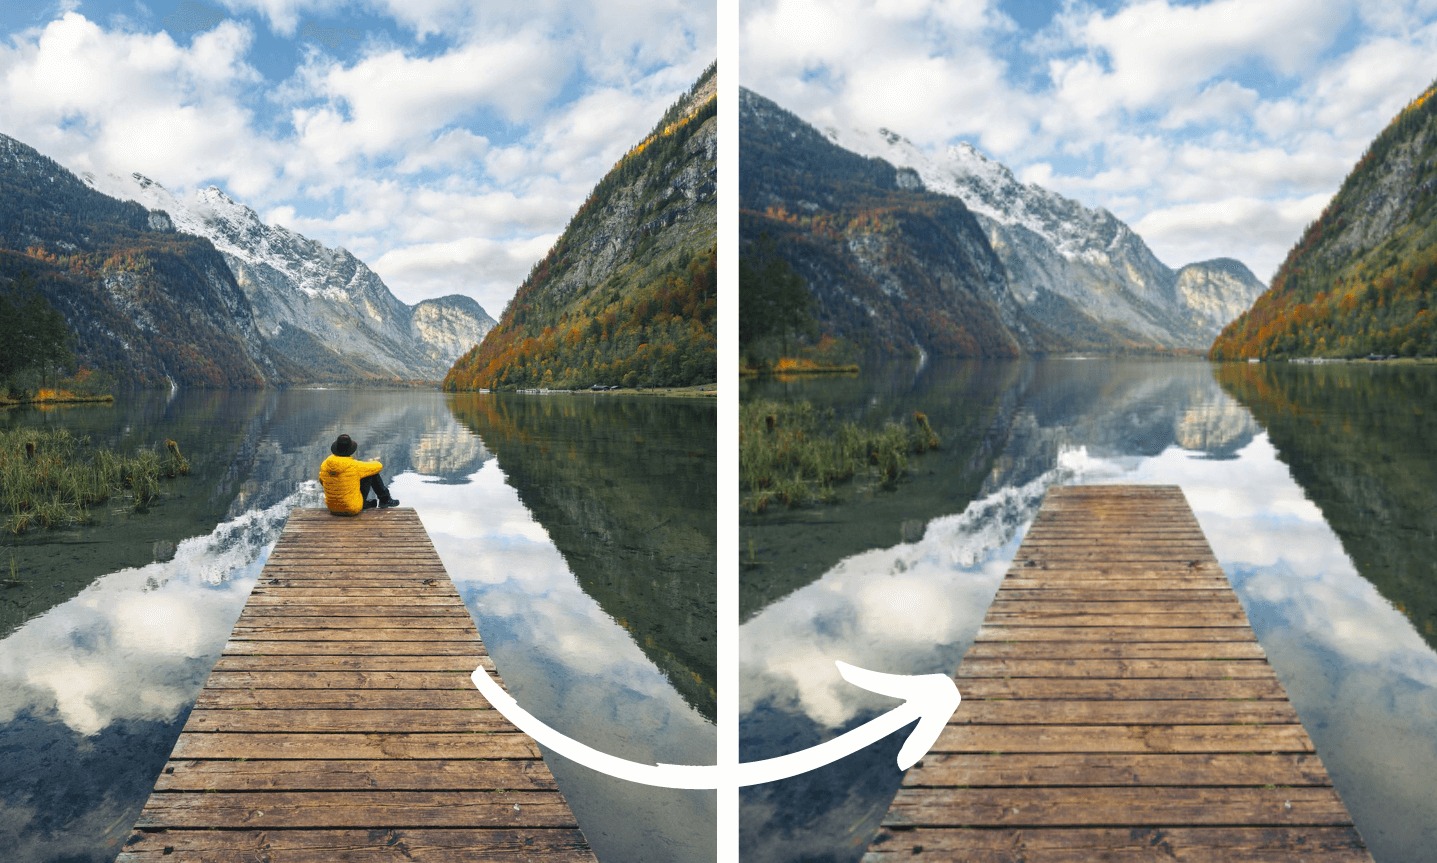
Been there, done that: You snap the perfect picture for your vacation only to discover that it’s been ruined by a photobombing bird another or unwanted tree branch. But never fear- with just a little digital voodoo, you can download objects from photos photos, liberating them form their worst fears. When it is time to remove unwanted folks from your impeccable family reunion photo or to make your living room look a little less lived in than it really is, there are plenty of opportunities right at your fingertips.
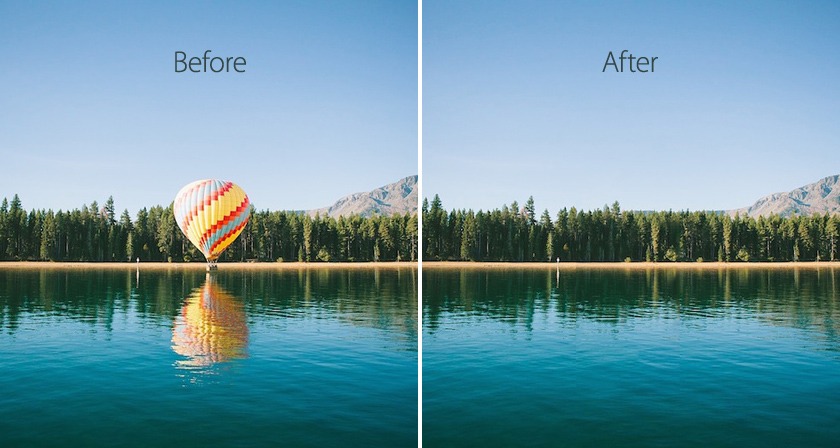
Let’s say you’re driving along the coast and get out to photograph the sunset. Water is reflecting colors so vivid that you’d swear it is alive. But right in the middle of your masterpiece stands a lamppost, foiling nature’s handiwork. Instead of grumbling about that fact, however, use these tools! They not only expunge all undesired intrusions, but they’ll turn your picture into something else entirely. It’s as if you had a magic wand for your photography. Poof! Lamppost gone!
Remember the time you wanted to upload a stunning architectural photo to Instagram? Some unwelcome passerby who suddenly popped up in your frame as you were about to press the shutter posed a subtle problem. Or how about a delightful shot at an amusement park, ruined by miles of queuing people? With tools that whisk away these irritations, a piece of art is what remains. And your followers will envy it.
Now let me tell you a little secret. Think of this tech as the unsung hero of marketing. Attention real estate agents! Have you always wanted to get rid of that junk car parked in such an awkward position right in front of where you were shooting the view home? Or simply make that garden appear spick-and-span by removing those stubborn weeds? Well with a flick of these tools, you can turn daydreams into tangible visuals- perfectly capturing the home’s allure for potential buyers, and leaving your customers convinced they have found their dream house.
Picture trying to get together a surprise anniversary present, using nothing else but those old group photos that had been forgotten long ago about. You’re looking for that one special moment between the two of you, so carefully concealed. Snap! There it is. But wait–all around both of you a large extended family crowds in. Not exactly the kind of print you were thinking about hanging above a fireplace. But no worry! Call upon these artistic tools, and it suddenly becomes only the two of you–basking amid fond memories.
As for teachers abound ideas, they make video clips very easily, drawings easier, from a math problem think tank to the more bizarre of meme scan. What about using a figure of a frog in its desert to inspire some debate? Abracadabra. Adjust the everyday photo, changing its context and challenging perception of students to get their attention Why not show them something new everyday? Accompany your students through the up-to-date wilderness of all this multiple tailed verb-ed action. It s almost so busy that there is no time to think. There s a widening road and along it frogs pop up in strange places.
Some items are not so easy to remove by accident, but generally it s worth a shot. These kinds of changes are not always as easy as pie. But witha little PRACTICE and the proper TOOLS, they can present the most captivating version of your world possible. Also, in case you are nervous, don t freakout! There is a complete set of tutorials to help you every step along the way.