The Magic of AI Object Eraser Technology
Technology has come a long way, hasn’t it? One minute you’re content with simple photo editing tools, the next you’re wowed by the ai object eraser. This wasn’t always the norm—removing objects from images once required a mix of skillful hands and lots of patience. Now, with advanced AI capabilities, it’s like having a wizard at your fingertips.
Let’s rewind a bit. Before this tech marvel, photo editors and graphic designers would spend hours, sometimes days, manually removing unwanted parts from photos. Don’t get me started on the precision required. Every pixel mattered, and a single misstep could mess up the entire image. It was an art form, and those who mastered it were nothing short of magicians.
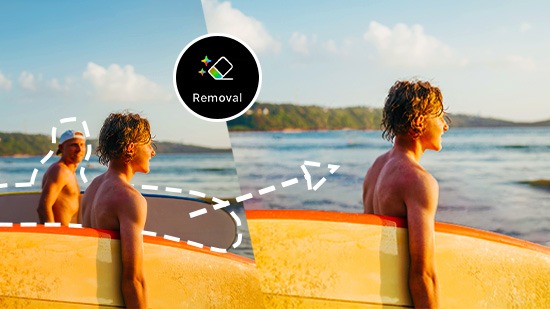
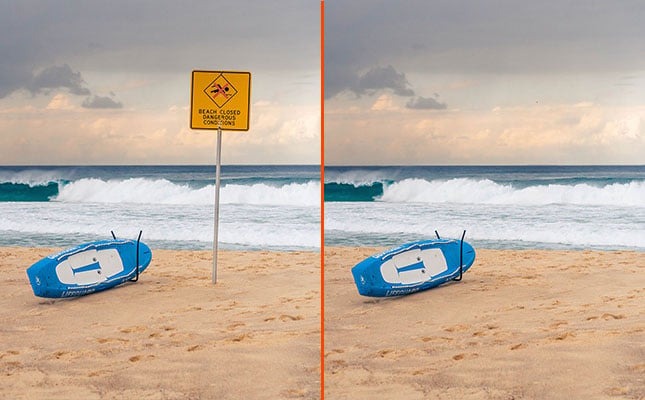
Fast forward to now. With AI object eraser tech, you can remove unwanted elements from your favorite photos quicker than you can say ‘abracadabra’. For instance, if there’s an annoying photobomber in your perfect beach photo, just a few clicks can make them vanish into thin air. No more laborious editing, no more tears over ruined frames.
Here’s a funny story: My friend, Jake, recently went on vacation. He took a glorious sunset picture, but a seagull photobombed the scene. Instead of grumbling, he used an AI eraser tool, and voilà, seagull be gone! The sunset photo? Pristine and Instagram-ready. It’s like magic, but rooted in cutting-edge technology.
This little trick is not just for hobbyists. Professionals in media, advertising, and event photography have embraced these tools. They no longer have to deal with the headache of removing objects manually. It’s a game-changer in their workflow, saving time and effort that can be invested elsewhere.
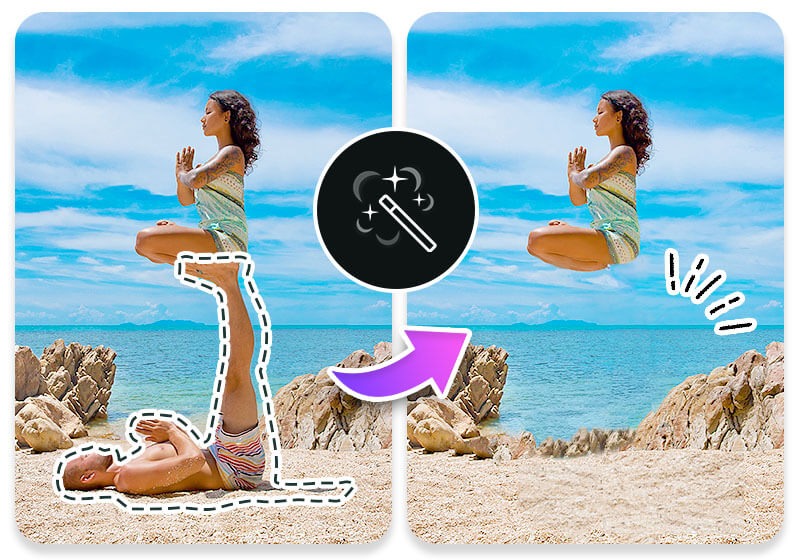
Let’s geek out a bit. What makes this tech so cool? It’s the algorithms. Imagine an army of robots meticulously analyzing every pixel in real-time. They detect patterns, textures, and colors with jaw-dropping accuracy. When you highlight an object to erase, these algorithms figure out what the background would look like without that object and recreate it, almost as if it was never there. Spiffy, right?
And it gets even better. It’s not just about erasing objects. This tech is evolving, adding more features by the day. Need to replace a drab sky with a bright, sunny one? There’s a feature for that. Want to tweak facial features or add whimsical elements? Oh, trust me, the options are expanding faster than you can keep up.
Think about the potential for storytelling. Whether you’re a blogger, a marketer, or just someone who loves to share snippets of life, these tools amplify your narrative. You can focus on creating compelling content without getting bogged down by technical hurdles. The AI does the heavy lifting, making it easier to bring your vision to life.
Remember those family albums with old, static photos? Imagine revamping them. You can now easily remove uninvited elements or enhance the overall look, breathing new life into old memories. It’s like giving nostalgia a fresh coat of paint.
Pop culture, too, is riding this wave. Movies and TV shows incorporate such technology for post-production refinements. The days of painstaking frame-by-frame editing are dwindling, replaced by smarter, faster techniques. This isn’t just a step forward; it’s a leap into the future.
Tips and Tricks for Stellar Results
Ever found yourself eyeing a photo and wishing that one annoying bystander wasn’t there? Enter ai object eraser—a digital wizard ready to pluck unwanted elements right out of your images. But like any wizardry, there’s a knack for getting stunning results. Let’s dive into making the most out of these cutting-edge tools.
So, you’ve got this spiffy AI object eraser—what’s first? Start with high-quality images. The clearer your photo, the easier it is for the AI to pinpoint and erase distractions. Think of it as giving the AI a high-definition map; blurry, pixelated images are like handing it a smudged drawing.
Next, use zoom. You aren’t just watching an ant colony from afar—get in there! Zooming into your image gives you precision, letting you outline areas more accurately. A fine brush works wonders. Imagine painting, where broad strokes can ruin details but a fine-tip brush retains them. That’s the essence here.
Also, don’t be afraid of multiple passes. Sometimes the AI eraser will get most of it but leave a smidge behind. Do another round. It’s like mowing a lawn—you might need to go over some spots again.
Another gem: consider the background. If your image has a complex background, the job gets trickier for the AI. Simple backdrops mean fewer headaches and better results. Think clean, not cluttered. A beach scene is easier than a bustling street.
Speaking of complex backgrounds, contrast is your friend. High contrasts between the object and its surroundings make it easier for the AI to do its thing. Black cat on a white sofa? Perfect. Black cat on a dark gravy-stained couch? Good luck.
A neat trick? Leverage the clone tool if your AI eraser includes it. This tool can mimic parts of your image to cover up messy areas after erasing an object. It’s like having a second chance to paint over the patchy bits.
What happens if things don’t go your way the first time? Different modes can save your bacon. Some AI erasers come with varying settings—smart, manual, etc. Switch it up if one isn’t cutting the mustard.
Here’s a pinch of wisdom from the trenches: patience is a virtue. Despite fancy tech, the process sometimes needs a bit of good old-fashioned persistence. Think of it like cooking a new recipe—not everything will be perfect the first go. Tweak, adjust, and keep refining.
And for Pete’s sake, save different versions! Every iteration of your edited image brings you closer to the result you want. Have backups like a good scout—best be prepared instead of facing a whoopsie moment.
Another snippet of advice? Play around with lighting and shadows. They can muck things up for the AI, making it harder to differentiate between what’s staying and what’s going. Adjust brightness and contrast to lend a helping hand.
Should you find yourself deleting large objects, post-process touch-ups can be a lifesaver. Clean up any residual messes left behind after the AI has done its part. Small tweaks can make a world of difference.
Lastly, let’s chat about practice. Yeah, it’s cliché, but practice makes perfect. AI tools improve with time and so do you. The more you fiddle around, the better your instincts get. Before you know it, you’ll be an erasing maestro.