Have you ever captured a perfect moment, the lighting, the composition, everything just right only to find an unwanted object or person photobombing your masterpiece? Whether it’s a stray piece of litter, an unexpected intruder in your scenic shot, or a power line marrying a beautiful landscape, Photoshop provides powerful tool works to clean up your images and keep the focus on your intended subject.
we’ll take you through the steps to seamlessly remove objects from your photos, turning those almost perfect images into the polished visuals you envisioned.

Target Audience: Photography Enthusiasts
Whether you’re a hobbyist photographer looking to enhance your personal album or a budding professional aiming to clean up your portfolio, mastering the art of object removal in Photoshop can dramatically elevate the quality of your work. This post is geared toward photography enthusiasts of all levels who have a basic understanding of Photoshop to remove and wish to improve their photo editing skills.
Why Learn to Remove Objects?
Removing distractions from your photos helps in focusing the viewer’s attention where you want it. It can also rescue great shots that would otherwise be unusable. With the right techniques, you can maintain the natural feel of your image without any trace of editing. That’s the power of mastering removing objects in Photoshop.
Tools and Techniques for Object Removal
Photoshop offers several tool works and methods for removing objects, each suited to different scenarios. We’ll explore the most effective ones, so you can choose the right tool for the job.
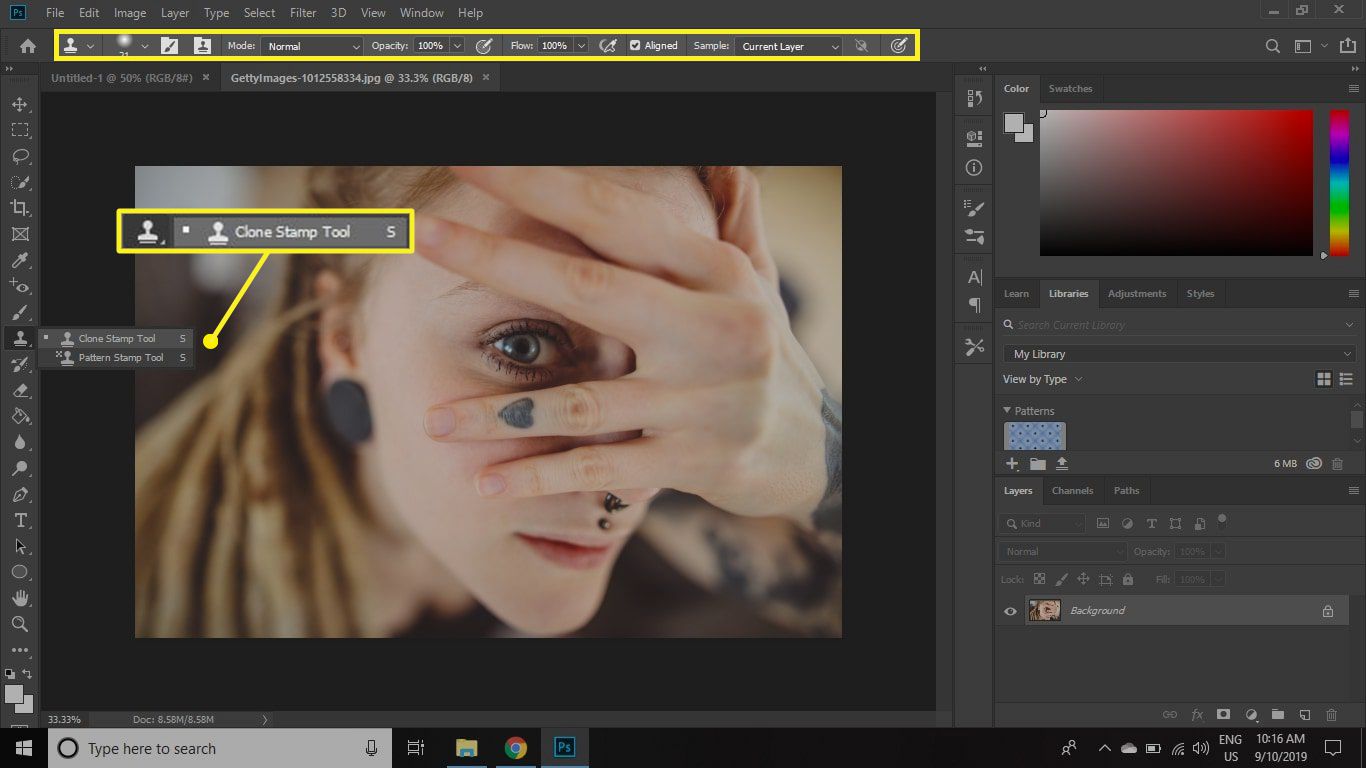
1. The Clone Stamp Tool
The Clone Stamp tool allows you to copy one area of an image in photoshop and ‘stamp’ it onto another. This is ideal for removing objects from photos against a consistent background.
How to use it: Select the Clone Stamp Tool from the toolbar. Alt-click (Windows) or Option-click (Mac) on the area you want to clone. Carefully paint over the object you wish to help you quickly remove.
2. The Healing Brush Tool
The Healing Brush is similar to the Clone Stamp but goes a step further by blending the cloned area with the surrounding pixels. It’s perfect for removing objects from textured or irregular backgrounds.
How to use it: Choose the Healing Brush from the toolbar. Alt-click (Windows) or Option-click (Mac) to sample the area you want to use for healing and paint over the unwanted object.
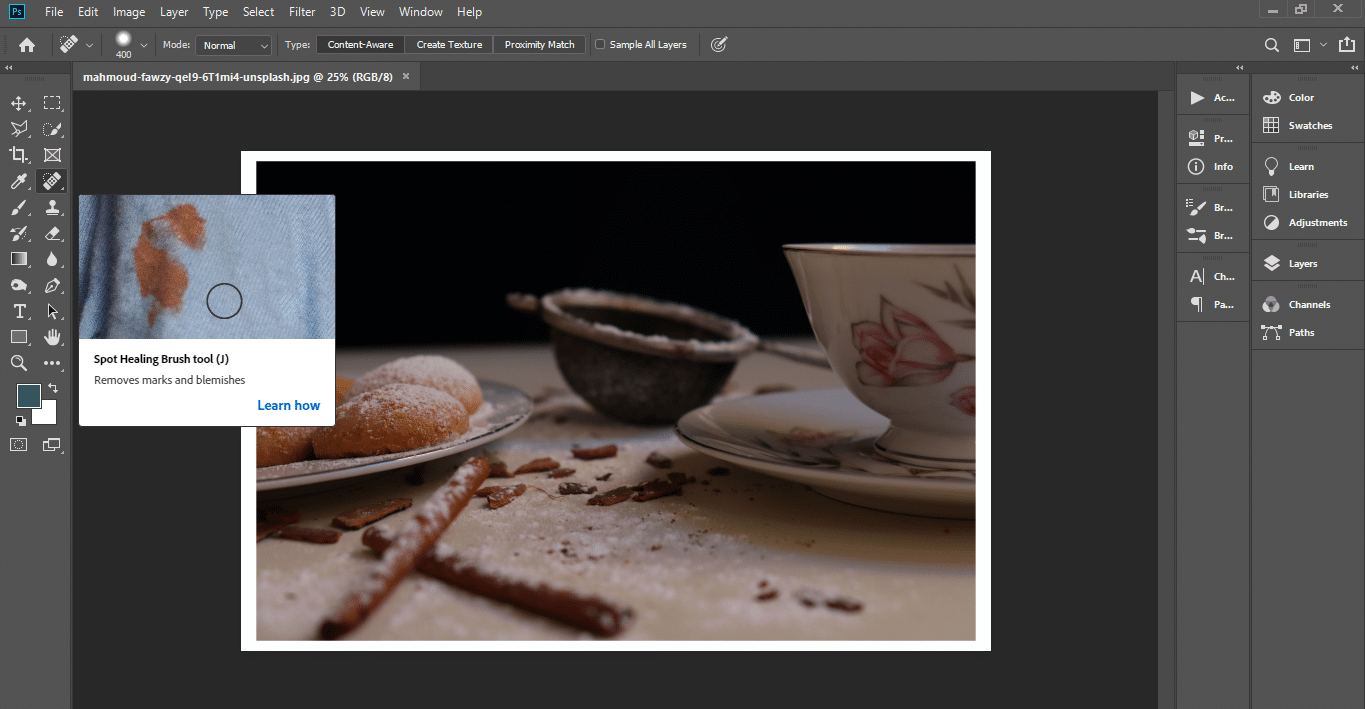
3. The Spot Healing Brush Tool in Adobe Photoshop
The Spot Healing Brush is the Healing Brush’s quicker, more automated sibling. It doesn’t require you to select a sample area; Photoshop does the heavy lifting.
How to use it: Simply select the Spot Healing Brush Tool, adjust the size, and click or paint over the object to remove it. Adobe photoshop automatically samples from around the retouched area.
![]()
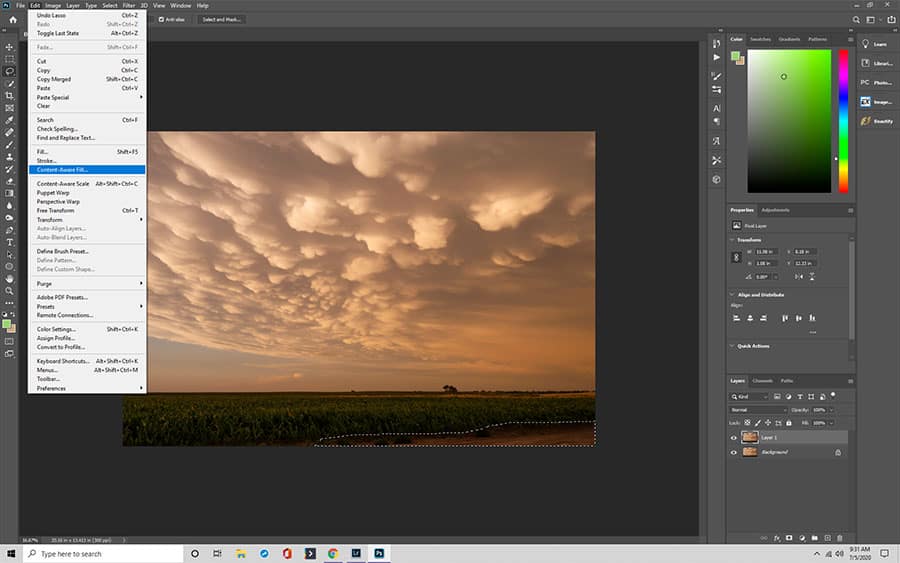
4. The Content-Aware Fill
Content-Aware Fill is a powerful feature that automatically fills the selected area with matching textures and patterns from the surrounding image. It works wonders on larger objects in complex scenes.
How to use it: Make a selection around the object you want to use an ai-powered remove tool. Go to Edit > Fill, and choose ‘Content-Aware’ from the drop-down menu. Click OK, and watch the magic happen.
5. The Patch Tool
The Patch Tool lets you select and drag an unwanted object to another area of the image. Adobe photoshop then fills in the blank area, blending it with the background.
How to use it: Select the Patch Tool, draw around the object to remove, and then drag the selection to a similar background area. Release the mouse button to apply the fill.

Tips for Seamless Object Removal
Always work on a duplicate layer to preserve the original image.
Zoom in for precision, especially when working with intricate details.
Use a soft brush edge for blending when using the clone and healing tools.
Be patient and take your time for a more believable result.
In complex cases, combine tools to achieve the best outcome.
Conclusion
Mastering the art of removing object selection in Photoshop opens up endless possibilities for creativity and correction in your photography. Whether you’re dealing with minor distractions or significant interruptions, Adobe photoshop’s toolkit provides the solutions you need to achieve that perfect shot. Practice these techniques, experiment with different tools, and don’t be afraid to mix and match methods for the best results.
FAQS
Q: How do I choose which tool to use?
A: Context guides tool choice for object removal. Simple backgrounds? Clone Stamp Tool. Complex textures? Healing Brush or Content-Aware Fill. Experience guides tool selection.
Q: Can object removal affect the authenticity of a photograph?
A: Object objects from an image removal can change a photo’s authenticity. Use it ethically, especially in journalism or history. For art or commercial purposes, consider its impact carefully.
Q: Are there any other techniques for selecting object removal in Adobe photoshop?
A: Yes, There are multiple ways to remove an object in Photoshop using, like using the lasso tool, layer masks, blending modes, and filters. Experimenting with these techniques can improve your skills and creativity.
Q: How can I ensure a seamless result when removing objects in adobe photoshop?
A: Attention to detail and patience are essential for seamless object removal. Blend texture, color, and lighting carefully. Experiment with tools and be prepared to adjust or restart if necessary.