Welcome to the world of digital art! We are sure that you’ve come to this page because you want to do a lot of things with your big canvas right now. This guide will help you understand a tool called the Background eraser tool. It’s like a magic eraser for your pictures, making them look awesome!
We are going to invite you to start learning the perk of the background eraser tool, getting know the important settings, as well as the easy tips to use it for your benefits.
Now, let’s talk about the Background Eraser Tool. It’s a special tool that helps you remove backgrounds from your pictures effectively. This is important for making your designs look professional and perfect.
You could also think of it like this: You take a great picture, but the background is not right. The Background Eraser Tool helps you fix that. It’s like a superhero for your photos!
So, get ready to explore this tool and learn how it can make your designs even better. It’s like unlocking the true potential for your creativity!
Quick Actions
Basically, using the tool is easy. But, you could use deeper settings to make the results much better. However, it requires more time and effort to finely do it. Maybe you’re in a rush or chasing the deadline. Therefore, you need to do quick actions to get the quick results. With Photoshop, you can easily change the background and give your pictures a whole new vibe.
Here’s a simple guide on how to do it:
Step 1: Pick Your Photo
Open your picture in the Photoshop software. You’ll find it in the Layers panel. Make sure to unlock the layer so you can make changes.
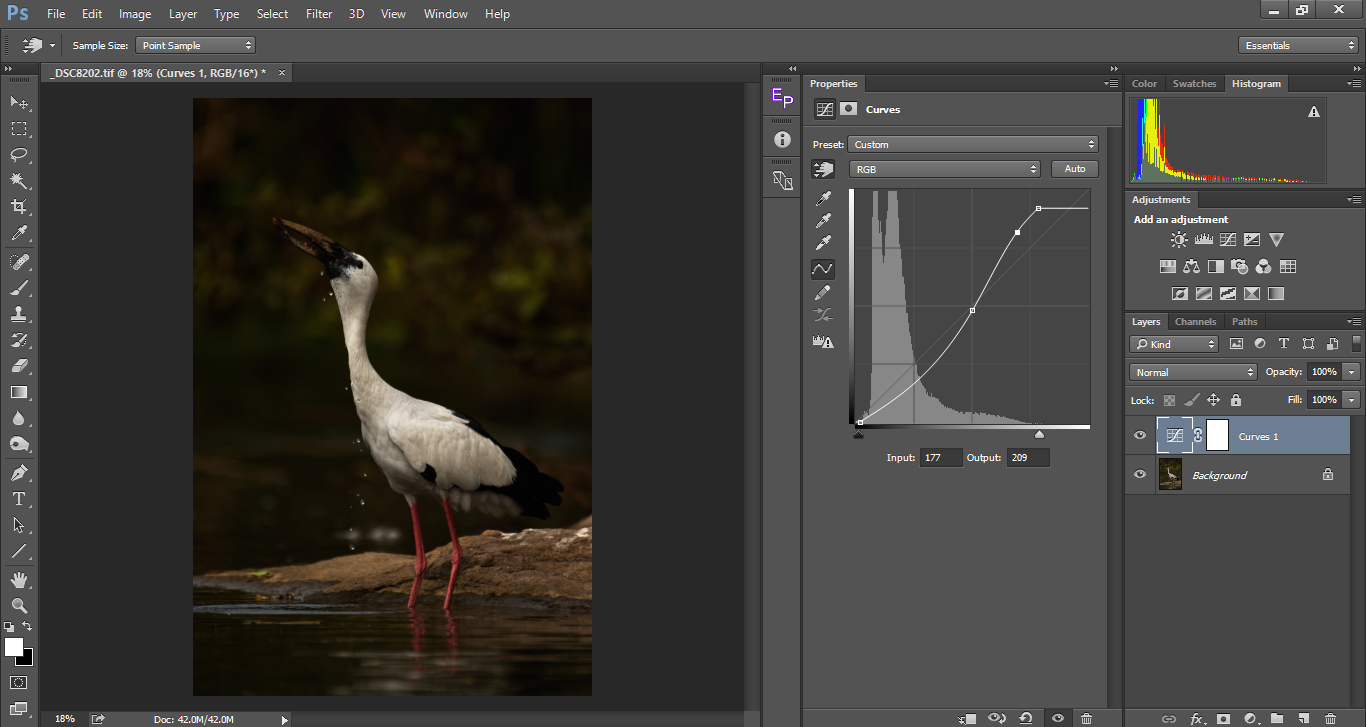
Step 2: Click to Remove
In the Properties panel, find the “Remove Background” option under Quick Actions. Give it a click, and watch the magic happen.
Step 3: Refine Your Edges
After removing the background, there might be noticable tiny bits around the edges. No worries! Use the Brush tool to clean up these small pieces.
Step 4: Replace Your Background
Want to transport specific object to a different place? Drag a new image onto your canvas. Press Enter or Return to make it final.
Step 5: Move It to the Back
In the Layers panel, move the new image under the original one. It’s like putting layers of paper on top of each other.
And voila! You’ve just given your photo a brand-new background without needing a big budget for picture editing services.
Tips for Perfection:
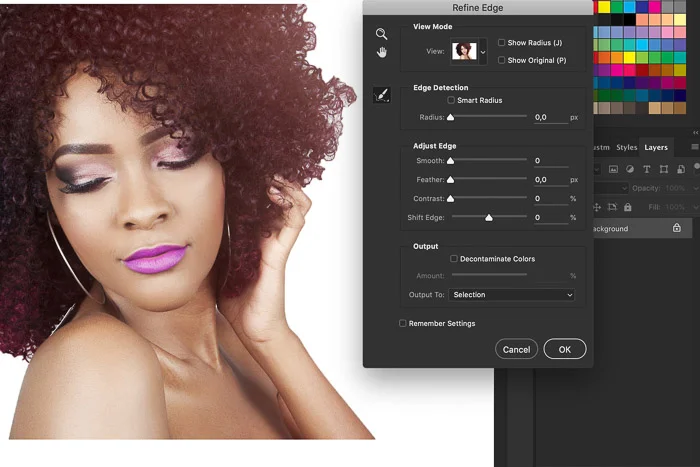
Refine Your Edges:
Check the edges of your object to make sure everything looks perfect. Especially around tricky parts like fire, sprinkle, ornaments, accessories, fur or hair. The Refine Edge Brush tool is your friend here.
Reveal or Conceal with Brushes:
After removing the background, use the white brush to reveal and the black brush to conceal any remaining bits around your main object.
Try a Transparent Background:
Make your background transparent. This way, you can use your isolated subject in different ways—like putting it on websites, emails, ads, and more.
Using Background Eraser Tool
If you have more time and want to bring the better result in your project, you could use our next tips.
Similar to a magic eraser, Photoshop’s Background Eraser Tool allows you to selectively erase undesired areas of an image by using its color palette. You may use it to delete any section of the image, regardless of the background—despite the name suggesting otherwise. You gain complete control over what you wipe, although it can take a little longer.
Step-by-Step Guide to Removing a Background using Background Eraser Tool
Photoshop’s backdrop Eraser Tool is your magic wand when it comes to backdrop removal. Let’s go over some simple ways to get your photos looking amazing:
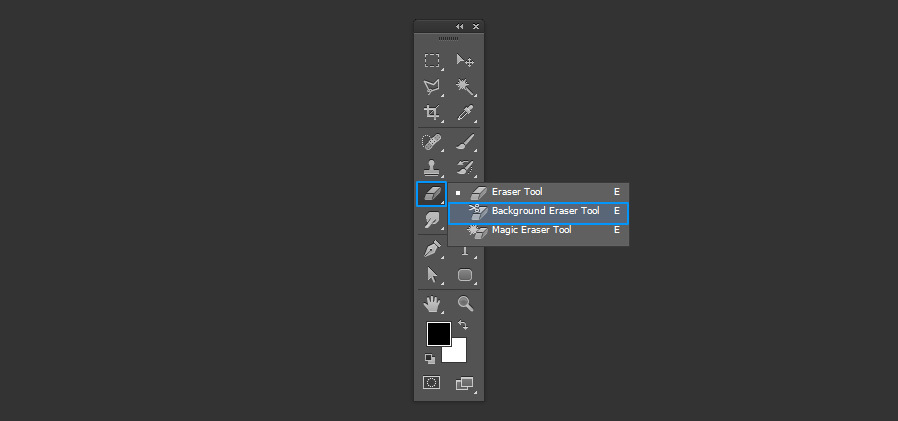
1. Find the Right Tool:
Look for the Background Eraser Tool in the Toolbar. You can find it with the Eraser Tool or press Shift + E until you see the Background Eraser Tool icon.
Click on that icon to choose the Background Eraser Tool.
2. Adjust Settings for Accuracy:
Once you pick the tool, change some settings to make sure you erase exactly what you want.
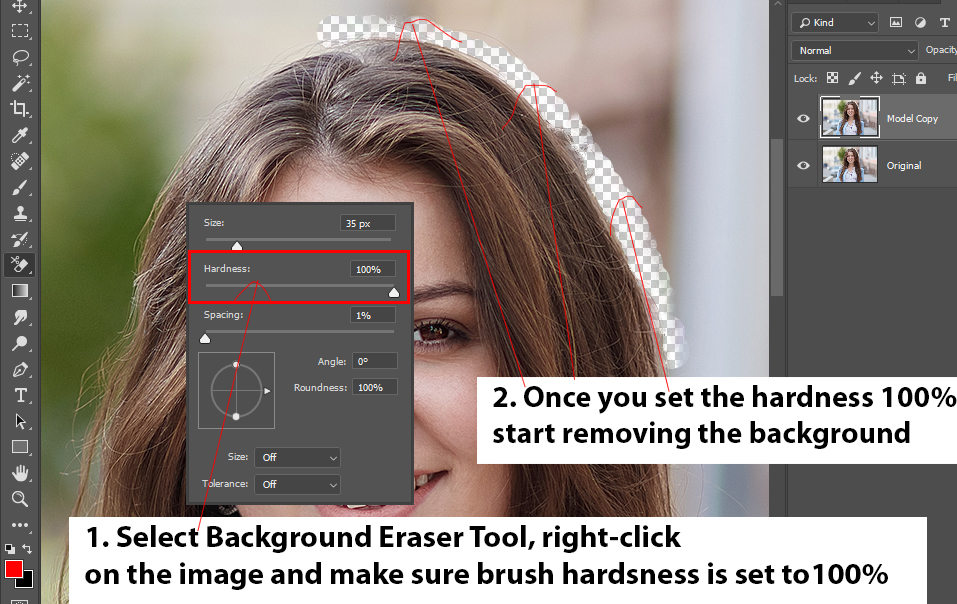
- Brush Preset Picker: Adjust the brush size. A big brush is good for larger areas, and a smaller one is great for details. Keep the hardness at 100% for clean erasing.
- Sampling Options: Choose the right option based on what you want to erase.
- Continuous: Good for backgrounds with different colors.
- Once: Erase pixels of just one color, no matter how much you drag.
- Background Swatch: Matches the color in the Toolbar for precise erasing.
3. Erase the Background:
With your settings done, start using the Background Eraser Tool.
Click and move your mouse over the area you want to erase. The tool will remove pixels based on your chosen color and settings.
Make sure you cover the whole area, and don’t worry if it takes a few tries.
4. Fine-Tune with the History Brush Tool:
Background removal is an art, and sometimes you need to fix the edges for a polished look.
Use the History Brush Tool (Y) from the Toolbar.
Go to Window > History to find the History panel.
Scroll to the top and check for the History Brush icon near your image. If it’s not there, click the empty box next to your image name.
With the History Brush Tool, gently brush over areas that need fixing or fine-tuning.
5. Save and Share:
Once you’re happy with your background removal, save your work.
Save as a PSD file if you want to keep layers for future changes.
If you want a picture without a background, export it as a PNG to keep things transparent.
6. Practice and Enjoy:
It is fun to play around with the tool in your photoshop software. Try different settings, brush sizes, and tricks.
Learn from each try, and soon you’ll be a pro at removing backgrounds!
Simplified Settings
What is the right setting for the background eraser tool? There must be a question like this if you want to play around with different scenarios in your graphic editing projects. Well, the answer will depend on your needs. But if you want to save your time, you could use our tips of simplified settings for the Background Eraser tool in photoshop.
Now, let’s make using the Background Eraser Tool super easy. To access it, find it in the Toolbar or press Shift + E. Here’s a quick rundown of the settings:
- Brush Preset Picker: Adjust the brush size for better erasing. Keep the hardness at 100%.
- Sampling Options: Choose continuous for different colors, once for one color, or background swatch to match the Toolbar color.
- Limits: Contiguous erases touching pixels, discontiguous erases separate pixels, and find edges is good for object edges.
- Tolerance: Controls the color range affected—low for solid colors, high for lots of colors.
- Brush Angle: Change the angle for hard-to-reach spots; rotate the canvas if needed.
- Protect Foreground Color: Save specific colors from being erased.
- Pen Pressure: Adjust opacity if you’re using a drawing tablet.
Using the simplified settings above, you can make your project get done effectively. And, it will save you a lot of bucks from hiring digital agency!
It is not Magic Eraser Tool
Perhaps you’ve heard about Magic Eraser Tool. Keep in mind that it is different from Background Eraser Tool Both tools work by erasing based on colors, but they have their differences. The Background Eraser requires you to drag over the area you want to erase, making it slower but more precise. On the other hand, the Magic Eraser is a quick click-and-erase tool, but it’s not as precise as its friend. But we’ll talk about it later in other discussion.
Conclusion
In conclusion, mastering the Background Eraser Tool in Photoshop opens doors to a world of creative possibilities. The Background Eraser Tool in Photoshop is a helpful companion for removing backgrounds. Whether you prefer it over the Magic Eraser Tool depends on your picture. Learn the settings, experiment, and enjoy editing with the Background Eraser Tool in Photoshop!